How To Capture Professional Quality Product Photography
A great product photograph showcases its subject in an adequate and appealing light, rendering each feature of the item to make a stellar first impression. Some refer to product photography as e-commerce photography, as one of its main functions is to entice customers to buy the item online without seeing it in person. How can you photograph a variety of products in a positive light, both figuratively and literally?
Learn how to capture professional quality product photographs by learning to use essential camera equipment to your advantage. Take inspiration from professionals in this niche by examining photos of your favorite products—how do they make the items look so attractive? This guide from Glide Gear is an ideal jumping-off point for your product photography hobby or career.
Set a Neutral Stage
The star of your photograph should be the product. While props and backgrounds can add to the story you aim to tell with your photo, make sure they don’t distract from your subject. Choose neutral colors for your backdrop to start; many product photographers swear by a simple white background.
However, you should increase the contrast and draw attention to the item by choosing a dark background if the product you’re capturing is white or light in color. A white table lamp against a plain black backdrop showcases the lamp and draws the viewer’s attention to its details.
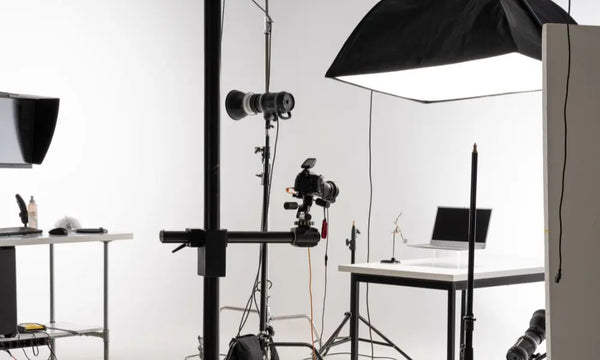
Use Adequate Lighting
Shadows and uneven lighting can create a visually striking and even spooky effect, but for product photographs, you want plenty of light to illuminate your subject. Natural light and artificial light both have their advantages and drawbacks; which option will serve your product best?
Natural Light
The sunlight that shines through your window is an accessible and free source of light for your product photography. Letting the sunlight in lends softer light to your shoot than professional videography lighting.
Natural lighting works best for the following types of products:
- Items you’re photographing outdoors that consumers are supposed to use outdoors.
- A person modeling some clothing (people look better in natural light!).
- Makeup products that have been applied to a model.
- All-natural or organic products.
Pro Tip:
Use a reflector on the opposite side of the window if you’re using sunlight from a window to light your product shoot. A reflector is a large piece of white material, like foam board or stretched fabric, that fills the other side of your shot with natural light.
Artificial Light
Use a three-point lighting kit or a light box to illuminate your subject if you want to light your product brightly and more directly. Artificial light is harsher by nature, but that’s a good thing in many applications! Your photos will benefit from artificial lighting if your product has lots of tiny details you want to highlight.
Consider using a lightbox or three-point lighting system for the following products:
- Jewelry and other small, detailed items
- Food products
- Collectible items like dolls, figurines, and model cars
- Clothing and accessories with intricate embroidery and other details
Stabilize Your Camera
Because you want your product photographs to show every detail of the item, you’ll do well to eliminate blur and shake from those shots. Many aspiring product photographers start by shooting with their smartphones; this is an accessible way to get started! Most tripods on the market offer smartphone attachments so you don’t have to hold it in your hand for the duration of the shoot.
Regardless of the type of camera you’re using, from an iPhone to a fancy mirrorless DSLR, invest in a sturdy tripod that’s compatible with your camera. Play around with the height and angle as you bring your product into sharper focus.
Use the Rule of Thirds
Many filmmaking and photography classes introduce the rule of thirds to their students early on. It’s a simple rule of thumb for professional-looking compositions and draws the eye towards the subject in a pleasing way. How does it work?
Divide your shot—your canvas—into nine equal squares as if you’re about to play tic-tac-toe on it. Think: three vertical segments and three horizontal segments. The idea is to place your subject along two of the imaginary lines you’ve drawn, especially at spots where they intersect.
Get Creative With Angles
You’ll need to shoot the product from a variety of angles to capture all the nuances of it. Think about the photos you peruse when you’re shopping online; each product likely has multiple photographs to show it off from all sides.
Flat lays are a common shot for items like clothing, food, and large products that don’t fit easily into a single frame. Affix your camera to an overhead flat-lay camera platform and adjust your lighting as necessary to shoot a flat lay without blur or shake. Shooting from directly overhead will display the product in its entirety, so potential customers know exactly what they’re getting when they buy it.
Incorporate Simple Props
Consider adding props to help tell your subject’s story and place the product into context. For example, if you’re shooting a finished cake for a bakery’s website, cut a slice out and place it on a plate with a small fork. This setup makes your subject (the cake) look more enticing and tempts viewers to take a bite.
Try adorning the product with its ingredients if you’re shooting product photography for a company that sells bath products! Place a bottle of lavender bath salts in the center of the frame and set sprigs of fresh lavender around it to communicate the product’s scent.
These tips will point you in the right direction, whether you’re just getting started in the world of product photography or looking to improve your existing skills. By focusing on lighting, composition, and the product’s story, your finished photos will encourage viewers to buy the item in question.
How can you professionally capture quality product photographs? Professional equipment will serve you well; as you improve, invest in lighting and stabilization equipment that will enhance your finished photos. Don’t hesitate to experiment with angles, lighting levels, and simple props that add visual appeal.
