Tips for Filming Art Tutorials for Your Channel
Creating art is already a fulfilling experience, but sharing your skills and techniques with others can enhance that joy tenfold. Whether you’re painting, sketching, crafting, or even exploring digital mediums, filming art tutorials for your channel is a powerful way to connect with people who share your passion. It’s not just about showing what you can do—it’s about inspiring others to try it themselves.
But let’s be real for a second. Filming doesn’t quite feel as natural as picking up a brush or pencil, does it? Figuring out how to capture your process, keep things engaging, and make sure your audience can actually follow along might feel like a lot at first. That’s why you’re here, though, right? You’re not just looking to hit “record”—you want to create tutorials that look great, flow smoothly, and do justice to your creativity.
This guide is packed with tips to help you do just that. Whether you’re just setting up your first tripod or looking to refine your video-making game, you’ll find advice to bring your art to life on screen. By the time you’re done reading, you’ll feel ready to press record and share your art with the world!
Plan Your Tutorial Before You Start
Before you hit record, take a moment to organize your thoughts. Jot down the steps of your process or the key techniques you want to showcase. This will help you stick to a clear flow and prevent rambling, which could lose your audience’s interest. Think about what your viewers need to know versus what they can skip.
For example, talking about your tools is helpful, but spending several minutes on a single paintbrush might feel overly detailed. Keeping a loose script nearby can act as your guide while you film. Plus, this approach saves you time during editing since you won’t need to cut out extra footage or try to patch up gaps in your instructions.
Invest in Good Lighting
Your audience needs to see details clearly, especially if you’re demonstrating fine lines, texture, or specific techniques. Natural light is fantastic if you film during the day, but relying solely on it can be tricky since it changes throughout the day. A softbox or ring light works well to create even, flattering light that doesn’t overpower your artwork.
Position your lights to reduce shadows and glare. If you work on a reflective surface like glass or varnished wood, consider using diffused lighting to avoid annoying reflections on the video. Playing around with the placement of your lights can help you figure out what works best to highlight your work.

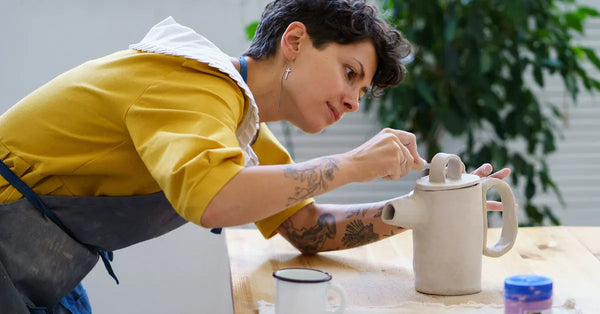
Use a Flat Lay Platform
One of the most helpful tools you can have when filming art tutorials is an adjustable overhead camera platform. This setup lets you capture a clear top-down view of your workspace, which is perfect for showing viewers exactly what your hands are doing. You won’t have to stress about awkward camera angles or your arms blocking the shot.
Plus, using a platform like this makes it easier to keep the camera steady while working. A shaky camera can be distracting and pull the focus away from your project. Test the platform’s height and angle before filming to make sure your art fits nicely in the shot without cutting off important parts of the frame.
Tidy Up Your Workspace
A clutter-free workspace helps your tutorials feel more polished and professional. Your background doesn’t need to be boring or bare, but you want to avoid having so much stuff in the frame that it distracts from your art.
For example, remove any unnecessary tools or unrelated items from your desk before filming. You can also bring in simple props or arrange your materials neatly for a visually appealing setup. If your workspace doubles as your living area or dining table, consider placing a clean mat or sheet down to create a dedicated filming zone. A little preparation goes a long way toward making sure your art is the center of attention.
Experiment With Angles and Close-Ups
Think of your tutorial as an immersive experience for your audience. Playing with different angles and close-ups adds variety and makes your videos more engaging. For example, you can switch from an overhead view to a side angle to show texture or brush techniques from a different perspective. Use close-ups for intricate details like shading, outlining, or delicate strokes.
Viewers will appreciate being able to see clearly what you’re doing. Using multiple angles might sound intimidating, but editing tools make combining footage smooth and straightforward. Plan your shots beforehand, so you know when to move the camera or take those close-up clips without stopping too often during your process.

Edit Thoughtfully
Editing is where your tutorial starts to take shape. Try to keep your video concise while still making sure all the important steps are included. Watch your footage and cut out moments that feel repetitive or unnecessary. You don’t need every single brushstroke on screen if it doesn’t add value.
On the other hand, quick rewinds, speed-ups, or text overlays can be fun ways to emphasize key moments. Add background music if it fits your tone, but keep it at a low volume—your instructions should still be clear and easy to hear. Consider adding subtitles, as they help viewers follow along and make your work more accessible to a wider audience.
Engage With Your Audience
Creating a connection with your viewers goes beyond just teaching them something. At the end of your tutorial, encourage them to leave comments or share their projects inspired by your video. Small gestures like asking a question or mentioning how you’d love to see their work build a sense of community.
Be responsive, especially when people ask questions or share positive feedback. It’s also good to reflect on your viewers’ comments when planning future tutorials. If people frequently ask about a technique you didn’t explain fully, take it as a chance to expand on that topic next time.
Now What?
Think of filming your art tutorials as a way to not only teach your techniques but to share your passion for art in a way that’s uniquely yours. Whether it’s your personal touch, your sense of humor, or the way you see the world, those are the things that will make your tutorials stand out—and keep people coming back for more.
And don’t forget, this is a process meant to grow with you. Your first video doesn’t have to be perfect. The more you create, the more you’ll refine your style and discover what works best for you and your audience. Be kind to yourself in that learning curve. What matters most is that you're putting your art out there and connecting with others along the way.